Question: How do I hook up multiple signs in an RS485 network?
Answer:
Here are illustrated instructions that show how to wire several signs in an RS485 network.
These photographs indicate how RS485 wire, RS485 modular cables, RS485 Network Adapters, and Alpha signs are installed.
Steps 1 and 2 describe how to connect the cable between the PC and the RS232 to RS485 Converter Box.
- Connect the DB9F end (the female end) of the 6-foot long Alpha Type A9 RS232 Cable to one of the COM ports in the PC that you will use to program the signs.
- Connect the other end of the Alpha Type A9 RS232 Serial Cable, the DB9M end (the male end), to the RS232 connector on the AMS RS232 to RS485 Converter Box.
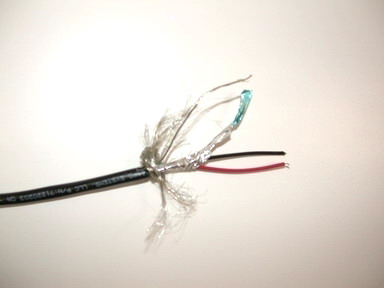
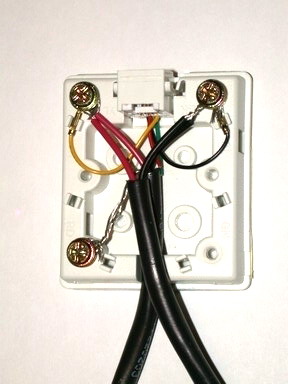
- Strip one end of the RS485 wire. You will find a black wire, a red wire, and a silver wire.
- Trim off the excess shielding, and remove about 1/3" of plastic from the red and black wires.
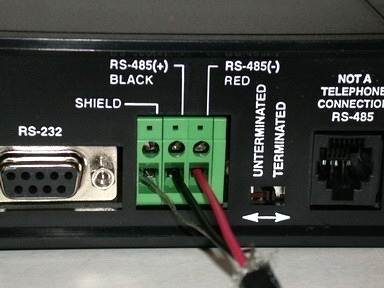
- Loosen the screws on the RS232 to RS485 Converter Box and connect the black, red, and silver wires as per the instructions. Make sure the connections are tight by gently pulling each wire.
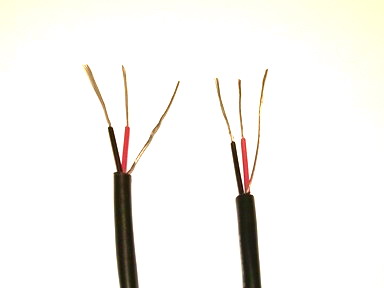
- Pull the other end of the RS485 cable from the RS232 to RS485 Converter Box to the first sign. Because we have more than one sign to connect, you will "daisy-chain" the RS485 cable. Cut the RS485 cable near the sign. Strip the wires on both of the new ends of the RS485 cable.
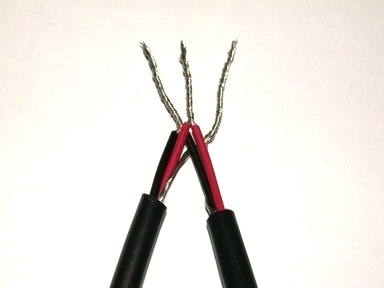
- Twist the two black wires together. Twist the two red wires together. Twist the two drain shield wires together.
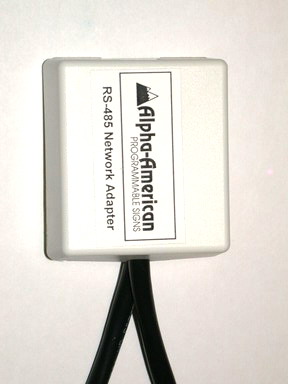
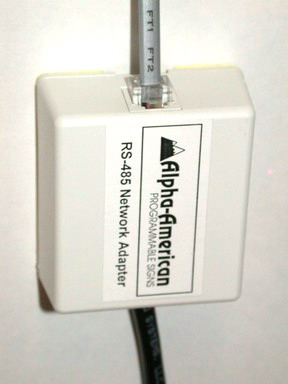
- Connect the twisted black wires to the black wire terminal in an RS485 Network Adapter. Connect the twisted red wires to the yellow wire terminal in the RS485 Network Adapter. Connect the twisted drain shield wires to the remaining screw terminal.
- Close the cover on the RS485 Network Adapter.
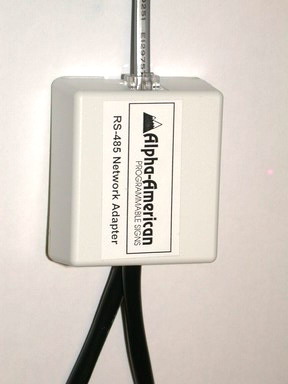
- Connect the end of one of the RS485 Modular Cables to the RS485 Network Adapter.
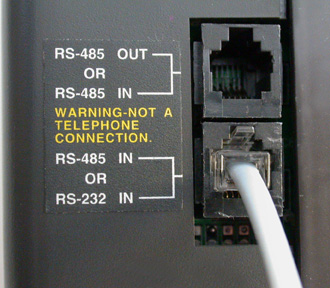
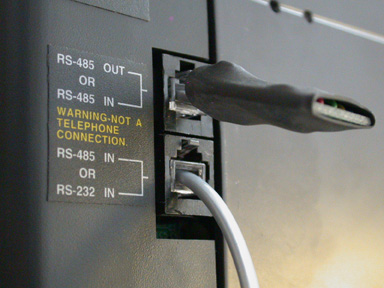
- Connect the other end of the RS485 Modular Cable to the RS232/RS485 jack on the first Alpha sign. The illustration below shows the jack on Alpha 4000 and Alpha 7000 models.
- Repeat steps 6 through 11 for the rest of the Alpha signs in your RS485 network. At the last sign location, strip the end of the RS485 wire, remove the shielding, and remove about 1" of plastic from the red and black wires.
- Connect the black wire to the black terminal in the RS485 Network Adapter. Connect the red wire to the yellow terminal in the RS485 Network Adapter. Connect the silver wire to one of the two remaining terminals in the RS485 Network Adapter.
- Plug the RS485 Modular Cable into the RS485 Network Adapter.
- Plug the other end of the RS485 Modular Cable into the bottom RJ11 jack on the back of the second Alpha display.
- Plug one of the Terminator plugs into the RS485 IN/OUT jack on the last Alpha sign. Set the Terminated/Unterminated switch on the Converter Box to Unterminated.